How to Sew a Scant 1/4" Seam Allowance
Share
What is a scant ¼" seam and why is it important?
When quilting, generally as long as your ¼" seam is consistent, your overall quilt will turn out ok. However, there are some patterns or designs that will require for your seams to be as accurate as possible otherwise this will be noticeable in the quilt.
A scant ¼" seam allowance is ever so slightly narrower (a hair’s narrower) than a standard ¼" seam allowance. A scant ¼" compensates for the loss of fabric in the folds of the seam or thread width after pressing the seams. This allows the block to stay true to the required dimensions.

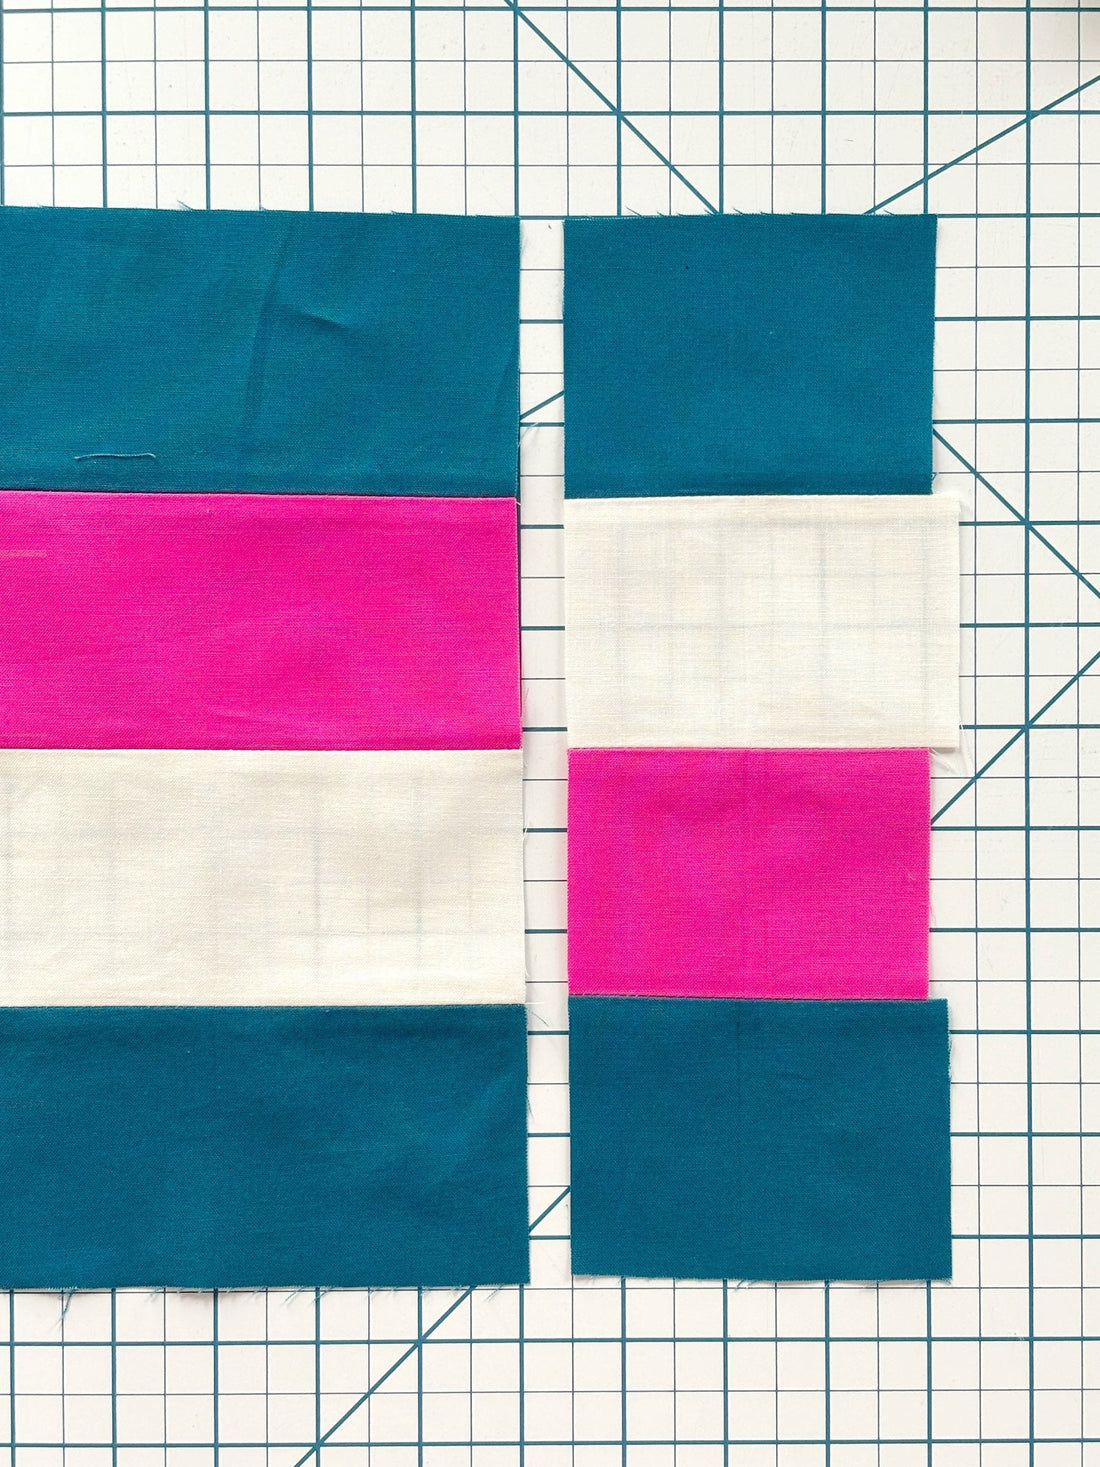
The example below shows you the difference between a scant ¼" seam and a ¼" seam in the unfinished block and the importance this difference can make to your finished quilt. The unit below should measure 12 ½" unfinished. The unit on the left was pieced using a scant ¼" seam, whilst the one on the right used a ¼" seam. Whilst the difference in the units is minimal, these losses will add up and will show up especially in blocks that require you to sew many pieces.

Finding your scant ¼" allowance
A ¼" seam presser foot helps in achieving a consistent seam allowance. For a scant ¼" seam, you'll need to make some adjustments to your sewing machine to achieve this.
1. You can try finding your scant seam by using your quarter inch foot and just touching the seam guide bar with your fabric whilst sewing. Practise on a test block using a few strips, until you get the scant ¼" seam right.

2. Change your needle position. If you have a machine where you can move the needle position from left to right, you're in good stead. Adjust your needle position ever so slightly to the right side until your get your scant seam just right.
My machine does not allow me to adjust my sewing needle position therefore, l make the following adjustments. I first add my ¼" presser foot and magnetic seam guide bar to act as a guide/landmark when adjusting for my scant ¼" seam. From there, l use masking tape. l like to layer 3 or 4 pieces of tape together as it creates an edge that l can butt my fabric against, similar to the seam guide bar. Make sure the tape is lined up on the left side otherwise it makes if difficult to set up the scant seam. I keep moving this piece of tape over and over until l get my l get my scant seam just right, using my seam guide bar to check and confirm that l put my tape a teeny tiny bit to the left side of it.
 4 layers of masking tape to act as a seam guide bar

3. After setting your seam, use two fabric scraps, sew and check that your scant ¼" seam is correct. If it helps, use a different thread colour for your ¼" seam and your scant ¼" seam. Keep making the necessary adjustments, either your needle position or moving your masking tape ever so slightly and stitch until you have a ¼" scant seam.

Time to test out your scant ¼" seam
Once you have your scant seam adjusted, take 4 scrap pieces of fabric that are 3" x 3" (different colours will help as you can see your seams clearer when checking size) to make a 10 ½" unfinished unit. Press seams, open or closed whichever your preference.
Measure the seams to check that they are correct. When measuring, use your seams as your guide. The middle seams should measure 2 ½" and the outer pieces should measure 2 ¾". If your unit does not measure 10 ½" unfinished, go back and adjust your needle position or your masking tape guide.


I hope you find this useful. I tend to keep that piece of masking tape there as it helps in helping me produce accurate seams and blocks that are the right size. More photos below of how l use the thick layer of masking tape as my seam guide.


