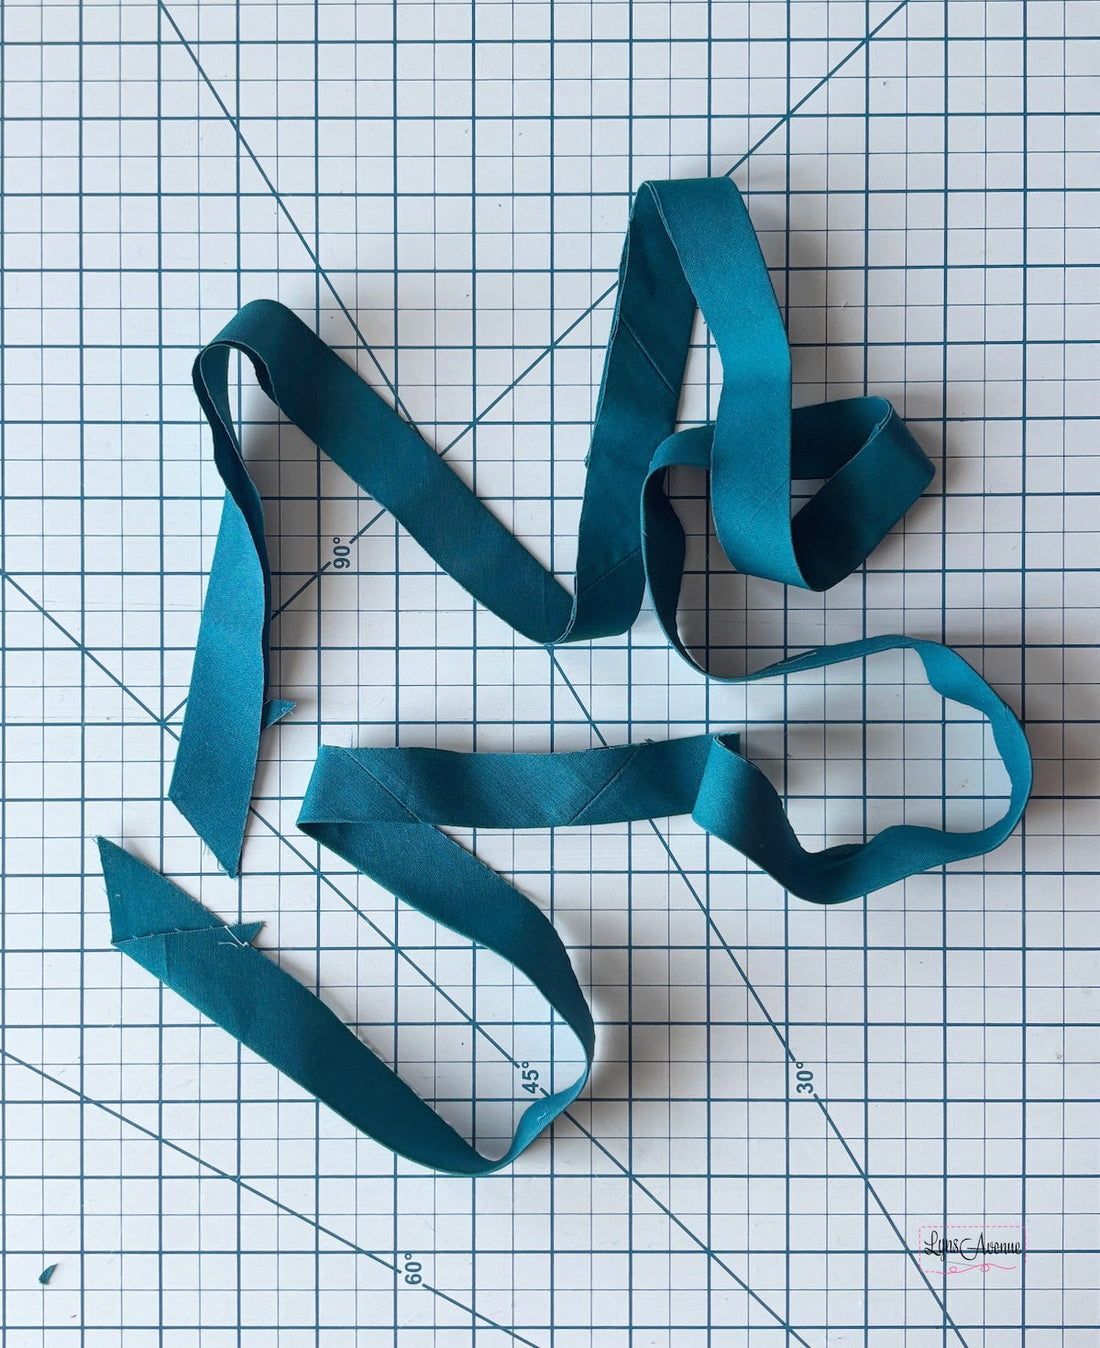
How to make single fold continuous bias binding
Share
What is Continuous Bias Binding
Continuous bias tape is a long piece of continuous strip of fabric cut on the bias (diagonally cut across the fabric grain). As it is cut along the bias, it is stretchier and more flexible. This makes it perfect to use for projects with curved edges or rounded corners; think bag making, in garment making for facing for armhole and necklines, finishing quilts with rounded corners, and so much more. This tutorial will show you how to make a single fold continuous bias binding from a square piece of fabric. Plus l've included a continuous bias binding calculations cheat sheet that you can download and print out.
This post contains affiliate links. I may receive a commission through purchases made through links from this post.

Supplies:
- Fabric
- Quilting ruler
- Rotary cutter
- Scissors
- Sewing pins
- Fabric marker: l use the Hera Marker (optional)
- Sewing thread
- Sewing machine

Bias binding maths
Before you begin, you'll want to figure out the starting size of the square for the binding length you need. How do you determine that, you ask. Let's work it out below;
Desired length of binding x the width of the binding strip = total bias binding.
Find the square root of the total = rounded up to the next whole number + 3" for seam allowance.
For example, using the perimeter of a quilt for desired length;
Desired length 180" x 2 ½" Width of binding strip = 450"
Square root of 450" = 21.21 - rounded up to 22
Add 3" for seam allowance to this number: 22" + 3" = 25"
25" x 25" is the starting square size required.
Get the Continuous Bias Binding calculations cheat sheet and pictorial here
or
You can purchase the printable dowload here
Lets begin
This tutorial uses a starting square size of 12" x 12" for a 2" width single fold bias binding.
The continuous bias binding calculations cheat sheet comes with calculations for both the 2" width and 2 ½" width strip for 15 starting square sizes and a how to make the bias binding pictorial.
Cut the square in half at a diagonal from corner to corner to create two triangles.

Flip the right triangle so that it sits on top of the left triangle, right sides facing and right angles sitting opposite each other. Pin in place.


Sew a ¼" seam allowance, press seam open.

Your piece of fabric should now look like this; a parallelogram (a shape with two sets of parallel lines).

On the wrong side of the fabric, draw lines 2" apart, parallel to the long edges. If making a 2 ½" width bias binding strip, your lines should be 2 ½" apart.

Bring the short edges together, right sides facing, raw edges and marked lines aligned to create a tube.
Word of caution: if you align your markings and sew at this point, you will have created yourself a lovely tube and will not be able to complete the remaining steps. So, let's continue onto the next step in making our continuous bias binding.

Offset the tube so that the first line matches with the second line.

Pin in place, placing the pin a ¼" mark from the raw edge, to help align the markings. Repeat the process, aligning and pinning the remaining lines. Your tube may appear out of shape but this is perfectly normal and will make sense in the next steps.


***Double check that the front and back lines a matched properly otherwise you will have difficulty when it comes to the cutting of the continuous bias binding strips which will result in a not so straight bias binding.
With your marked lines are matched, sew a ¼" seam allowance along the pinned edge, press seam open.

***Remember that word of caution about offsetting your marked lines and that out shape looking tube, this is where they both matter. If you had not offset your strip, you will not be able to make the first cut that will allow you to have a continuous strip. Instead, you will end up with separated ring pieces.
Use the first marked line to start cutting the binding strip. Continue cutting along the marked lines to make one long continuous bias binding strip.


Fold the binding strip in half lengthwise, wrong sides facing and press.

Congratulations, you've made yourself some single fold continuous bias binding. Hope you enjoyed the tutorial and happy binding.
Get the Continuous Bias Binding calculations cheat sheet and pictorial here
or
You can purchase the printable dowload here
Below is a quick snap pictorial that you can get along with the bias binding calculations cheat sheet. Cheat sheet also includes calculations for 15 starting squares, calculation formula and calculations for both a 2" width and a 2 ½" width bias binding strip.



1 comment
Thanks for this! I’ve wondered how it’s made for awhile. With the shift to match up the lines, I presume you’d have a bit of stretch even if you didn’t create the bias “grain” with the triangles, but not as much as with a true bias. Could you use that with quilts where you didn’t actually need bias binding?